ng-class for dynamic styling

This is a guest post by Tomas Kotlar. Thanks for your contribution, Tomas! Remember than anyone can reach out to me to contribute or suggest post ideas.

ngClass, as defined by the Angular documentation, is a built-in attribute directive that dynamically modifies the behavior of other HTML elements.

Common use cases

Conditional Styling

Let’s consider a button element that changes color based on whether it’s disabled or active. We can use ngClass to toggle between the ‘active-btn’ and ‘disabled-btn’ classes, giving the button a responsive touch:

Whenever the button is clicked, the toggleDisabled() function will be executed, toggling the value of isDisabled.

As a result, the button will become enabled or disabled based on the updated value of isDisabled, and the corresponding style (active or disabled) will be applied.

Using an Object

ngClass goes beyond just toggling classes. It also lets you iterate over object properties to apply your styles conditionally. This can be handy when working with data-driven apps or displaying dynamic content.

For example, using the following data:

In our HTML, we can apply dynamic styles using an array:

Based on the type (‘hero’ or ‘villain’), the directive applies the appropriate highlight class to the hero card.

Combining classes using conditions

With ngClass, you can mix multiple CSS classes, toggling them individually or creating compound styles:

The hero cards will be highlighted for heroes who can fly and have a different style for heroes who cannot, based on the canFly property.

Best practice: Using types with the HttpClient

Here is an example of code I see way too often when people submit their code to our Angular certification exam:

While I could almost live with the above code, the following example makes me angry (especially because I tell people NOT to do that in bold uppercase characters in my instructions):

What’s the problem with that code? It uses any, and any is dangerous. It isn’t good because it turns off type safety. It makes your code less safe; it removes type information, it makes it less maintainable. It’s excruciating when we know that the HttpClient is nice enough to let us specify the type of the data we’re going to get as a response:

Of course, this type of information does not guarantee that the server is going to return data of that shape, so we have to make sure the server is indeed returning that exact type of data.

But the thing is, once you add that type to your HTTP request, you can (should I say, you must) do the following:

And this is important because when you subscribe to that Observable, Typescript knows what kind of data you receive:

And that is why we use Typescript. Using the above syntax enables autocomplete in your IDE; it brings type safety so you can’t make typos. There are only benefits to using it.

One more async pipe syntax trick

We’ve covered a few different async pipe syntax tricks earlier in this newsletter, as well as why it’s important to use the async pipe to automate your subscriptions/unsubcriptions from Observables.

Today, let’s see another interesting syntax that can be very helpful when a template has multiple subscriptions, such as:

Even if using ng-container, as we saw earlier this week, is helpful, it would be even better to have just one place where both subscriptions happen.

We can simplify the above by creating a new object that has one property for each Observable value as follows:

That way, all our async subscriptions are in one place, and the rest of our HTML template is much more readable.

What is ng-container?

Yesterday, we covered ng-template and touched on different scenarios when it makes sense to use ng-template. Let’s now introduce a close relative of ng-template called ng-container.

There are a lot of similarities between those two elements, which can both be used to use structural directives such as ngIf or ngFor, with the bonus that ng-container can be used with the shorthand syntax of those directives:

One thing you probably noticed as an Angular developer is that we can’t use two structural directives on the same element:

In this scenario, using ng-container is the perfect way to use both directives without adding any HTML to the DOM, as ng-container, just like ng-template, doesn’t create new DOM elements:

Another use for ng-container is to become the host of a ng-template, similar to the way that a router-outlet is the host of routed components:

Such templates can be passed from a parent component using @Input and let the child component decide when to display which template, which is very powerful:

You can find a complete code example of such a feature in this Stackblitz and a more in-depth tutorial here if you want to try it.

Notifications from LocalStorage with Signals

Yesterday, we saw that LocalStorage can be used as a persistent cache to store our data in the browser. Earlier, we covered that services are a cache of their own but have one instance per app/browser tab, which means that applications opened in multiple tabs can have an inconsistent state since they each have their own “singleton” services.

LocalStorage can be used to share data between multiple tabs that render the same application. Even better, there is a storage event that can be listened to to know when another tab updated LocalStorage:

Using the Rxjs fromEvent function, we can turn the above event listener into an Observable:

And if we’re using Angular 16+, we can turn the above Observable into a Signal with one more function:

The above Signal could be used in a service to synchronize data between tabs. Spying on that Signal to see what’s going on in it is as easy as registering a side-effect on it using the effect function:

You can see that code example on Stackblitz.

LocalStorage and SessionStorage

Last week, we covered the lifecycle of Angular applications and how services can be used as a cache for our data.

I mentioned that Angular apps are independent applications running in a browser tab and that closing such a tab “kills” the application and frees the memory used by our app – thus losing any data stored in our services. Using the browser’s refresh button would also clear everything – similar to a reboot of the application.

If we want a more persistent cache, we can use the localStorage API from Javascript. Learning that API takes five seconds:

The above code stores the string “Tom” in the browser localStorage under the key “myCat”. To read that value, later on, all we need is the following:

And that’s it! Such storage will remain in place if the user closes your app’s tab or even closes the browser and shuts down their computer. Your data stays in the browser storage if the user does not clear the browser’s cache.

Also, such data is stored based on the domain on your web app, so other websites cannot read your storage values, and you can’t access values from other websites either.

One last tip: To store objects or arrays in localStorage, we have to turn them into strings, which means we usually do the following:

And to read that object from localStorage:

Note that sessionStorage has the same API as localStorage, but follows different rules and has a shorter life span:

  • A page session lasts as long as the tab or the browser is open and survives over page reloads and restores.
  • Opening a page in a new tab or window creates a new session with the value of the top-level browsing context.
  • Opening multiple tabs/windows with the same URL creates sessionStorage for each tab/window.
  • Duplicating a tab copies the tab’s sessionStorage into the new tab.
  • Closing a tab/window ends the session and clears objects in sessionStorage.

Using precise types with Typescript

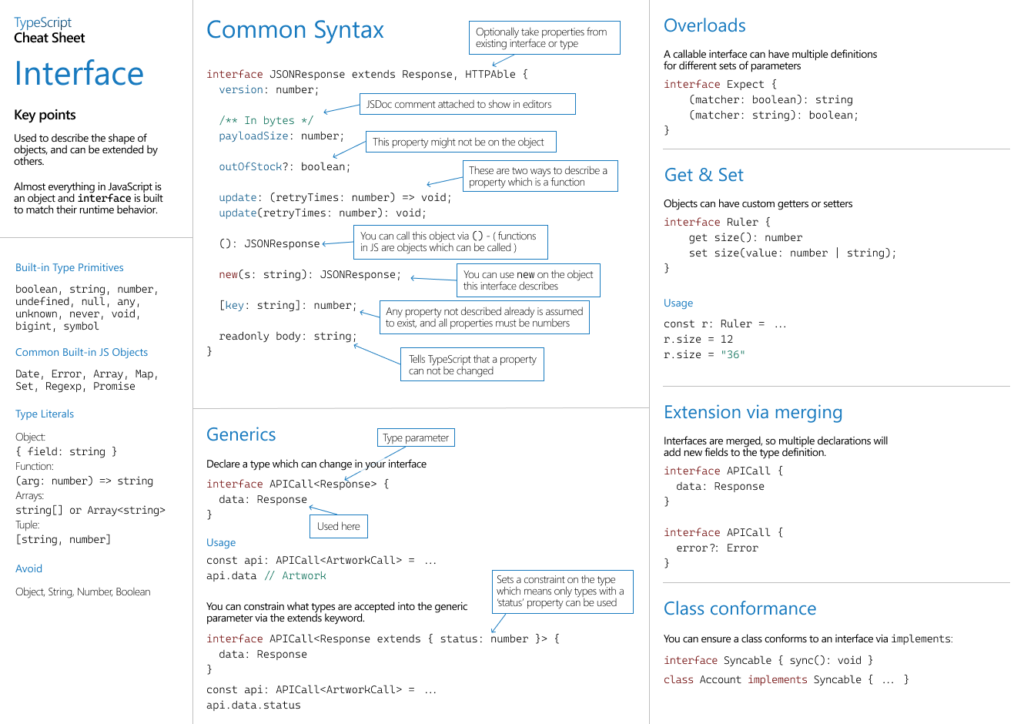
Typescript has a lot to offer when it comes down to… types. Which makes perfect sense, right? Let’s take a few examples based on the following interface:

The following variable is meant to store the id of a User in our application. The type of that id is a number, so this declaration is accurate:

But could be a lot more precise if we used the following syntax instead:

Now we are expressing that id is of the same type as User id (which is still a number), and we make it explicit that we’re using this variable to store a User id, not just any number. We are using an indexed type.

We can use a similar approach for our language. Instead of being any string, we can narrow that type using union types:

A user’s language can only be one of the four listed values. This makes our code safer (a typo would be caught by our compiler and IDE instantly) and doesn’t impact performance (union types do not get compiled into anything).

Using services to cache data

Yesterday, we saw that services are singletons that are created once for all and stay in memory as long as the application is open.

This makes our services the best place to store data that can be shared between multiple different components. Such services can use BehaviorSubjects or Signals to cache that data and replay the last value automatically to any new subscriber (component, directive, pipe, service, etc.).

Here is an example using a signal to store a value and expose it in a read-only fashion:

This article compares BehaviorSubjects and Signals to cache a shareable value.

Lifecycle of Angular applications

The lifecycle of an Angular application is something that many aspiring Angular developers struggle with. People often ask me questions such as:

  • How long does this component/service/directive stay in memory?
  • How do I save the data before I navigate to the next page/view/component?
  • What happens if I open that same app in another browser tab?

Here is how to think about it:

  • When we open an app in a browser tab, we’re booting an Angular application in a self-contained memory space, similar to a virtual machine.
  • Closing that tab is equivalent to killing the application, freeing any memory associated with it, just like when you close a desktop app in your machine’s operating system.

In Google Chrome, there’s even a task manager where you can see the memory footprint and CPU usage of your tabs and browser extensions – they’re just like independent desktop apps:

From an Angular perspective, a component gets loaded in memory whenever displayed on the screen. That’s when its class is instantiated.

Suppose the component gets removed from the screen (by navigating to a different component or removing it with a ngIf directive, for instance). In that case, the component is destroyed, and all of its memory state is gone. The same goes for directives and pipes: They get created when used by a component template and destroyed when that component gets destroyed.

Services are different, though. A service is created by Angular when a component needs it for the first time. Then, that instance remains unique and shared between all components that inject such service. A service doesn’t get destroyed: It remains in memory as long as your app is open and you don’t close your browser or tab.

This answers our three initial questions:

  • How long does this component/service/directive stay in memory?
    Components stay as long as they’re in the DOM. Services stay as long as the app is open.
  • How do I save the data before I navigate to the next page/view/component?
    Not if you save it in a service
  • What happens if I open that same app in another browser tab?
    You create another separate instance of everything: Components, services, etc. Both instances are independent and do not share any data or memory space.

Using setters for better @Input

When using @Input in our components, we can implement ngOnChanges to be notified whenever an input value has changed:

The above code works and would run whenever id or name are updated by the parent component. The problem is that this syntax can quickly become heavy when there are several @Inputs in your component.

Instead, we can do this:

Instead of using @Input() on a class property, we can use it on an ES6 setter function. The benefit of the setter syntax is that it makes it obvious what kind of code we’re running when the @Input value is set. No more ngOnChanges needed.