How to create custom directives?

I’ve touched on when it makes sense to create custom directives , how to use bindings in directives, and how to get creative with Angular selectors.

Today, let’s tackle how to create custom directives. The first thing to do is to use the Angular CLI:

ng generate directive [name]

or ng g d [name]

It’s also possible to generate standalone directives with the --standalone option:

ng generate directive [name] --standalone

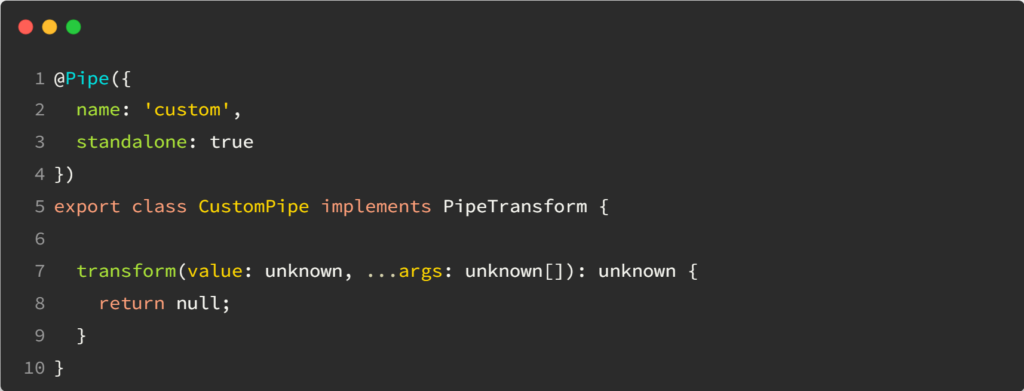
Once you’ve done that, you end up with an empty class to implement:

At that point, it’s important to remember that a directive is just like a component. The only difference is that a directive doesn’t have an HTML template. As a result, we can still use @Input(), @Output(), and all sorts of bindings and listeners.

As a result, your directive will manipulate HTML attributes and events on its host element. Here is a typical example of a custom directive that sets a credit card logo image based on a credit card number:

Its source code looks like this:

As you can see, we use an @Input() to receive the cardNumber and a host binding to change the value of the src attribute. You can find a step-by-step tutorial that explains the above code in more detail here.

Localized pricing now available for all courses and exams

Subscribers of this newsletter are located on all continents worldwide. Still, I’m based in one of the most expensive states (California) of one of the most expensive countries (USA) in the world, which means that sometimes, people complain about the prices of my services.

Good news! I decided to apply purchase parity pricing (PPP) on all my courses and certification exams, which also applies to the upcoming Angular Accelerator program.

If you live in an eligible country and go to the purchase page of any of those courses, a banner will appear with a coupon code that gives you a discount based on your country’s economic situation.

Of course, I can also make further exceptions on a case-by-case basis, so feel free to email me if you’re in a challenging situation and need financial assistance, or if the banner doesn’t show up for you.

RxJs trick: Emitting from an Observable into a Subject

Using a Subject to emit data is something we do a lot in Angular applications, and more often than not, what we try to emit is the result of an HTTP request, such as:

While the above works perfectly well, it’s important to know that the subscribe method of an Observable takes either a function as a parameter (which is what I’ve done in the previous example) or an object that implements the Observer interface. We touched on that interface earlier to illustrate exciting things we could do with the tap operator.

The thing is that Subjects implement that interface, so we can simplify our earlier code into:

This isn’t just a syntax improvement, as writing less functions results in better overall Javascript performance. Less code to ship = less code to download = less code to interpret and store in memory for the browser = faster user experience. You can see a code example here on Stackblitz.

How to create custom form controls with Angular?

When working with lots of forms, you’ll likely use similar controls repeatedly: A country selection dropdown, a state selection dropdown, a date-range picker with specific constraints, etc.

Instead of duplicating our code, which is never a good idea, Angular allows us to create custom form controls that integrate with Angular’s form validation mechanism.

This feature requires our custom control component to implement an interface called ControlValueAccessor that has the following methods:

I have a detailed tutorial and code example if you want to dive deeper into that topic.

It’s also worth noting that you don’t have to start from scratch when implementing a control value accessor. Angular has a DefaultValueAccessor directive (the one used by FormControl, NgModel, etc., in Angular forms) that can be invoked with the selector ngDefaultControl, and there are a few more options available, such as the SelectControlValueAccessor.

How to run code in an injection context?

Yesterday, I introduced an injection context, and we saw a few locations where we could inject dependencies. This can be limiting in scenarios where we call a method that creates and returns an Observable outside of an injection context, as we can’t always initialize observables in a constructor. Does that mean we cannot use the takeUntilDestroyed operator in those scenarios?

No, because we can store our injector for later use using the following approach:

The key is to use the runInInjectionContext function and pass the injector as a parameter.

For the takeUntilDestroyed operator, we can inject a DestroyRef in our injection context and then use it as a parameter whenever we need that operator:

Problem solved! We can use all these tools from the framework in any place we want, thanks to EnvironmentInjector and DestroyRef.

What’s an injection context?

In the past few months, the introduction of the inject() function and the takeUntilDestroyed operator shared something important: While these features are based on functions, these functions have to run within an Angular injection context, or you’ll get errors from the framework.

That’s because Angular relies on dependency injection for almost everything. As a result, it’s helpful to know what is an injection context.

The most apparent injection contexts are these:

  • Constructor of an “Angular class” such as services, components, directives, pipes, etc.
  • In the initializer for fields of such classes.

Here is an example of what is and isn’t an injection context:

Other places are injection contexts:

  • In the factory function specified for useFactory of a Provider or an @Injectable.
  • In the factory function specified for an InjectionToken.
  • Within a stack frame that is run in an injection context.

In other words, this is when you’re configuring a module or dependency injection. The most common examples are related to the router – guards, resolvers, and such are all in the injection context, so we can inject dependencies there:

Pluralizing text with the i18nPlural pipe

Pluralizing is as natural in human language as it is painful to handle programmatically. Let’s say we want to address the following scenarios in an app that displays the number of posts:

  • If we have zero, display “No post.”
  • If we have one, display “1 post.”
  • If we have more than one, say 5, display “5 posts.”

We could use a combination of ngIf / else scenarios to handle this, but it would get ugly quickly. The upcoming control flow API would help, but it’s not available yet.

Instead, we can use the i18nPlural pipe as follows:

The above syntax determines what to display for each scenario: 0,1 or any other value. You can find an example here on Stackblitz.

Combining multiple Observables with ngrxLet

Last month, I explained how to use ngrxLet to render a loading template. Earlier this year, I also covered how ngrxLet can be a great alternative to the async pipe. All in all, ngrxLet is a fantastic directive that keeps improving.

For instance, we can also use it to combine multiple different Observables into one local variable as follows:

Without ngrxLet, the equivalent code would have to use the async pipe syntax trick covered last week:

This also works, but it’s more verbose and has the downside of using ngIf, which is present only because we need a structural directive to enable the local variable assignment micro-syntax.

How to use HTTP interceptors?

Angular HTTP interceptors can intercept and modify HTTP requests and responses. They can be used for a variety of purposes, such as:

  • Logging the details of HTTP requests and responses, such as the URL, headers, and body. This can be helpful for debugging and troubleshooting.
  • Authentication: Authenticate requests before they are sent to the server by adding custom headers to the HTTP request.
  • Caching: Interceptors can be used to cache HTTP responses, improving performance.
  • Error handling: Handle errors that occur during HTTP requests. This can help provide feedback to the user when the connection with the server is lost.

To create an Angular HTTP interceptor, you must create a class that implements the HttpInterceptor interface. The intercept() method of this interface is called whenever an HTTP request is made.

This method allows you to inspect and modify the request before sending it to the server.

Here is an example of an Angular HTTP interceptor that logs the details of HTTP requests:

To use an Angular HTTP interceptor, you need to register it. You can do this by adding the interceptor to the providers array of your AppModule as follows:

Once you have registered an HTTP interceptor, it will be called whenever an HTTP request is made.

You can see a complete example of how to intercept a request to add an auth token in this tutorial. The tutorial also covers how to intercept a response and change it. A complete example of such an interceptor can be found on Stackblitz.

Browser dev tools for LocalStorage

Last week, I introduced localStorage and sessionStorage. I also suggested a few options to get notifications when such storage gets updated.

Today, I will cover how we can visualize and debug storage data. In Google Chrome, open the dev tools (right-click on the webpage, then “inspect” or press Ctrl + Shift + I).

Once the dev tools panel shows up, click on the “Application” tab:

You can select Local Storage or Session Storage on the left-hand side. This shows you the contents of those storages on the right-hand side in key-value pairs. Storage is by domain, so using those tools on a different website would show you different data.

If an object is stored as a JSON string, you can click on the key-value row, and Chrome shows a collapsible version of that Javascript object at the bottom of the screen, making it easy to explore complex objects:

There are two buttons in the top right corner of that same panel. One allows you to clear the entire storage for the current domain, while the second one (the X) clears the currently selected key-value pair:

You can edit a key or value by double-clicking on the corresponding cell in the right panel’s table. This makes testing different values, resetting a cache, or debugging specific scenarios easy.