Note the different type narrowing options, such as: if (“property” in object), which can come in handy instead of creating extra types. Type guards are exciting as well, though rarely used in Angular applications:
In the past few weeks, we’ve covered different examples of directives, such as the CDK Listbox directive and the CDK Drag and Drop directive. I have mentioned that directives are underused in Angular applications these days, and one way to use more directives is to adopt the directive composition API.
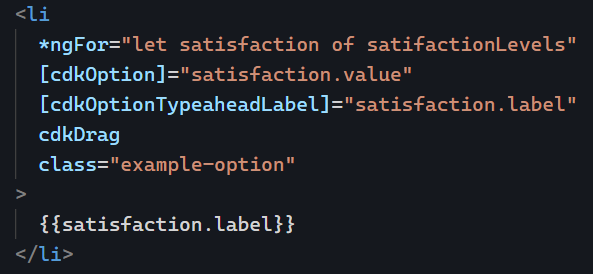
Let’s consider our previous example of a list of items:
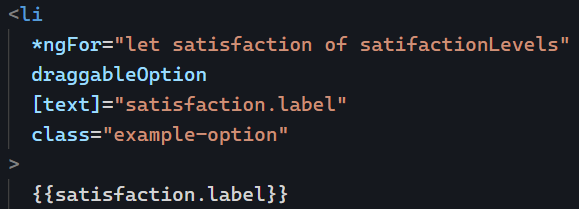
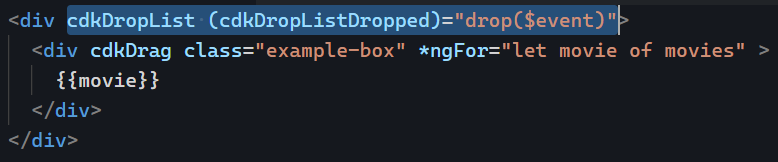
Let’s assume we want to make our list flexible enough to support re-ordering items using drag and drop. To do so, we could start using multiple different directives on the same element, such as cdkOption and cdkDrag (code example here on Stackblitz):
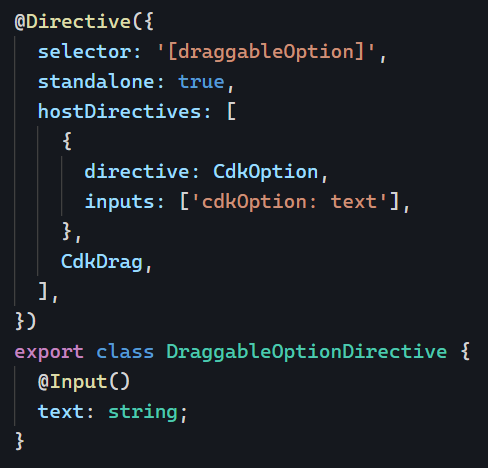
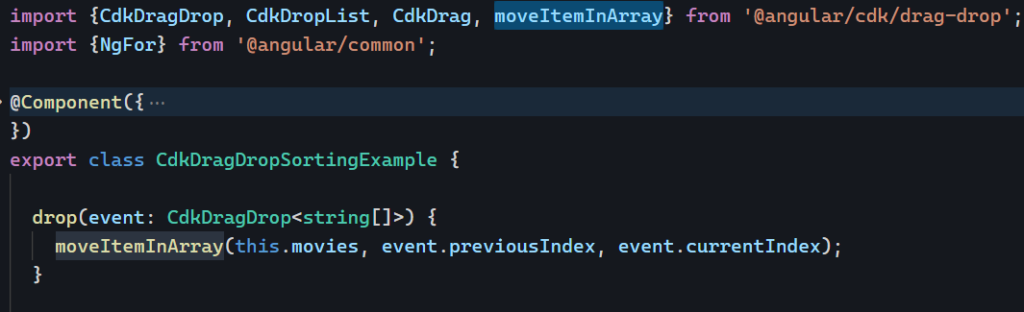
While the above code works, it’s designed for a one-time use case. If we know that our application will use several droplists that support drag-and-drop, we should start thinking about creating our own custom directive that refactors these different features in one place. Enter the directive composition API:
This new directive draggableOption is composed of both cdkOption and cdkDrag to achieve the desired result. We have one input text that is forwarded to the cdkOption input thanks to this syntax:
Note that both inputs and outputs can be forwarded that way (code examples here). The beauty of this approach is that our new directive has very little code while packing reusable features in a concise syntax. This is how we would use our new directive:
You can find that example live on Stackblitz here. There are a few caveats with the directive composition API, mainly that it only works with standalone directives and that the options to “forward” inputs and outputs are limited for now. However, the composition API is an excellent option to make our code more reusable and immune to copying and pasting collections of directives from one component to another.
This is the final post in our JavaScript series on destructuring. Let’s focus on the rest operator, which materializes with three little dots ... as follows:
One way to put it is that the rest operator means “everything else goes into a new array.”
This syntax also works with objects, with the “rest of the properties going into a new object”:
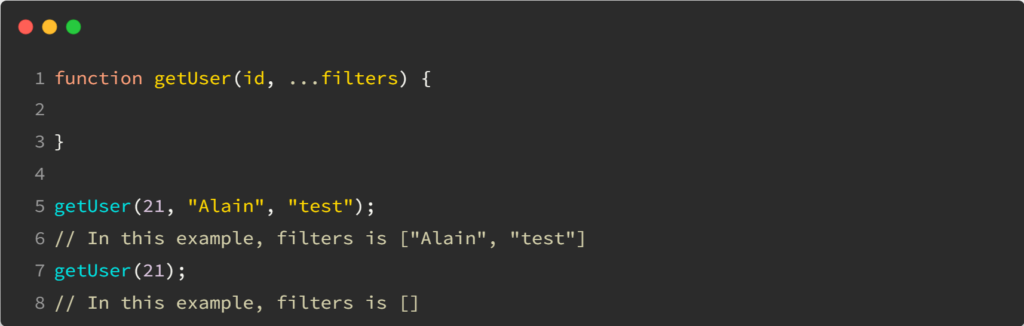
The rest operator can also be used in a function to catch several parameters in an array:
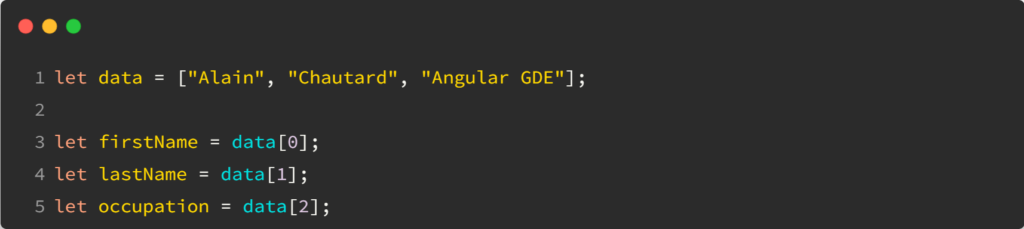
While the above code works, it is very lengthy and repetitive. It also increases your code base’s size, negatively impacting performance. Instead, we can use a modern JavaScript syntax introduced with ES6/ES2015 called object destructuring:
The above line of code does the same as the three previous lines. What if we want the local variable to have a different name than the original property? Say we want to name our new variable homeAddress instead of address. We can do it like this:
What if we want those variables to have a default value in case they are not defined in this.user? We can do that too:
Now you know everything you need about object destructuring.
Drag and drop features can dramatically improve the UX of a web application. Implementing drag and drop with Javascript seems intimidating, which is why we have the Angular CDK (Component Development Kit).
Let’s say we have a list of items we want to be able to reorder using drag and drop:
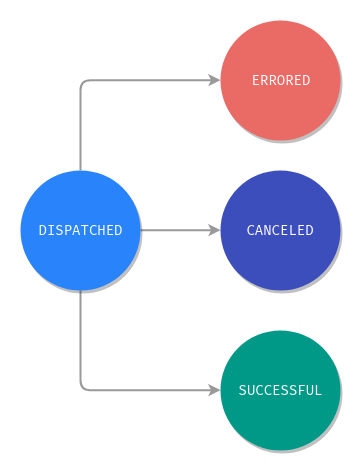
Let’s get back to our series on state management with this post. So far, we covered that state management libraries give us a global State that gets updated using Actions and Reducers. I haven’t told you yet that typical Redux Reducer functions are meant to be synchronous. In other words, you’re not supposed to make an HTTP request or anything asynchronous in a reducer.
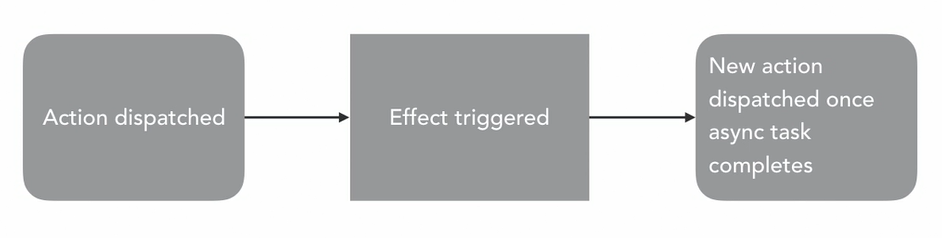
So, how do we implement asynchronous tasks? This is known as a side-effect (because it involves a third party such as a server) or just Effect.
When we use Effects, the idea is to have an Action that triggers the Effect, and once the Effect completes, another Action is triggered:
For instance, in our current switcher example, we could have an Action called LOAD_EXCHANGE_RATES. This Action would trigger an Effect to make an HTTP request and fetch exchange rates from an API. For instance, the original Action would also update the State to make it a “loading” state.
Then, once the HTTP request completes, the Effect would dispatch another action, EXCHANGE_RATES_LOADED and pass the data as its payload so it gets stored in the State.
Effects are implemented differently based on the state management library
NgRx
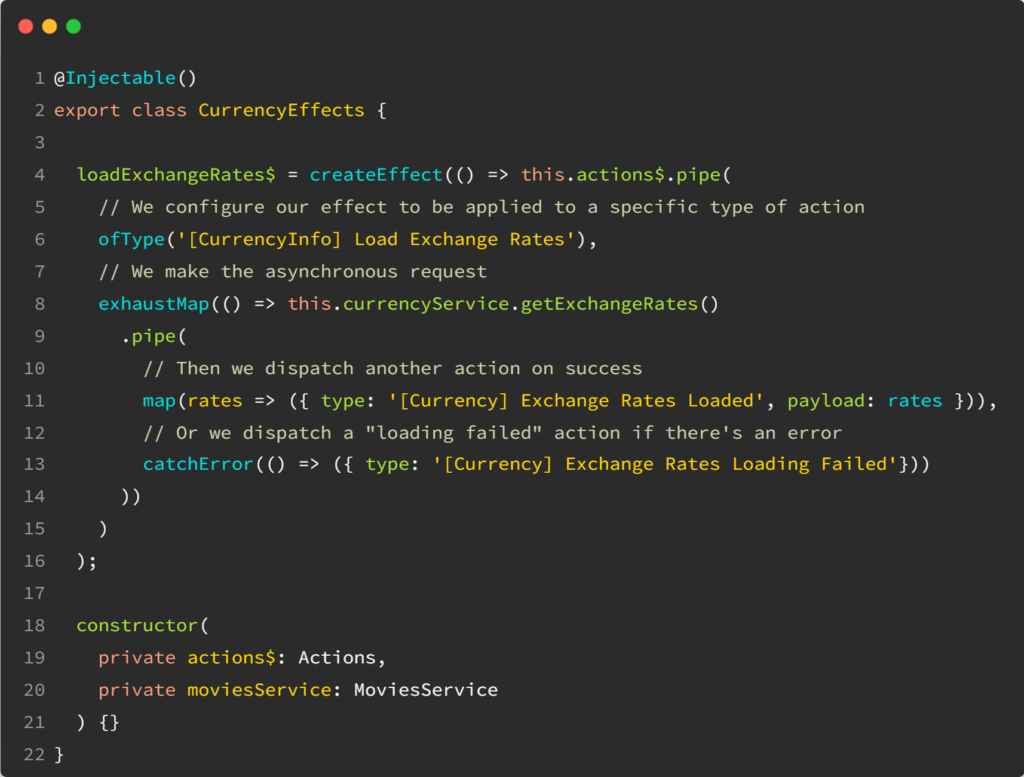
NgRx effects rely heavily on RxJs and look like this:
As you can see, the Effect code is verbose, but every single step makes sense: We turn an action into an asynchronous request that dispatches other Actions upon success or failure.
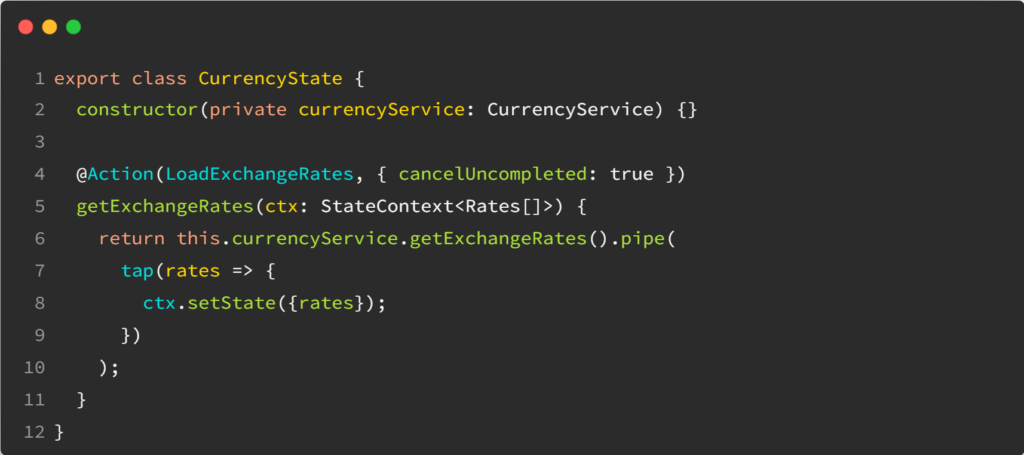
As a result, action handlers (reducers) can use asynchronous requests without needing any effects:
As you can see, even if the Redux concepts remain the same, every state management library has a different approach. I like NgXs because of its simplicity. The code is more to the point and less reliant on RxJs operators.
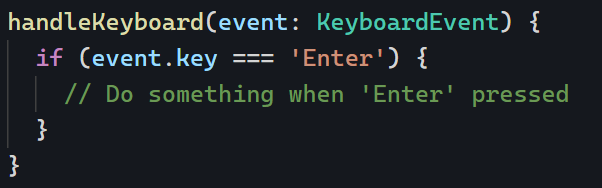
Let’s say we want to trigger an action when the user hits enter on their keyboard. We could do something like this, capturing the keydown event and then decide what to do based on the entered key:
While the above works, it’s pretty verbose. Instead, we can make our binding more specific by doing the following:
Now, that’s a lot more specific and less verbose. The same goes for class bindings. Here’s a lengthy example:
Since all we want to do is toggle the green class on or off based on a boolean expression, the following syntax is shorter and better:
We know how to create a State and dispatch actions to update its value. Now let’s see how to receive updates when the State gets updated.
Most state management libraries provide what is known as Selectors. A Selector query function runs against our State and returns an Observable. For instance, with NgXs, a Selector can be created with the @Select decorator as follows:
The above code creates an Observable that returns any value update in state.currencyInfo. If you don’t like decorators, you can also use the select function from the Store service:
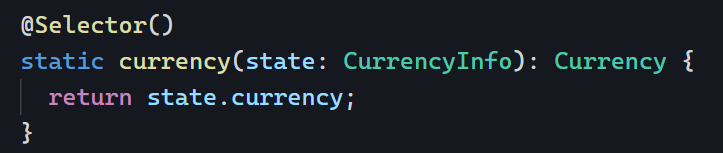
Both options return a similar Observable. If a Selector of a slice of your State is used repeatedly, you can make it a memoized selector by using the @Selector decorator in your State class. This example creates a new selector that returns just the currency property of our State:
Such a Selector can be used with @Select decorator in your components/services as follows:
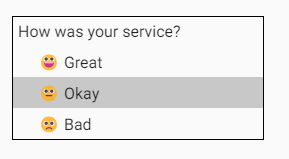
Often, HTML dropdowns are too basic to allow for meaningful customization of what gets rendered in the dropdown. This has led to the creation of several custom components, such as Material Select.
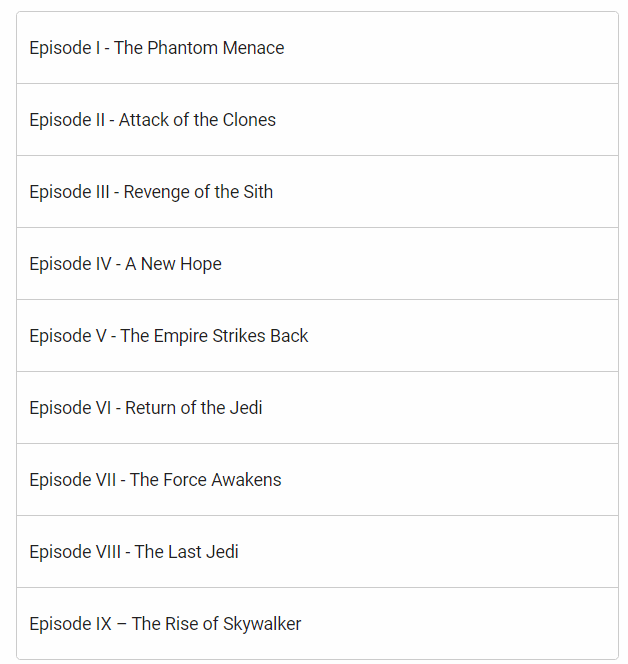
But what if you’re not using a library and still need to customize a list of items for your users? Something like this, for instance:
Implementing such a UI with HTML is not very difficult. The complexity of the task comes from getting all the expected behaviors for an accessible experience, such as keyboard interaction and focus management.
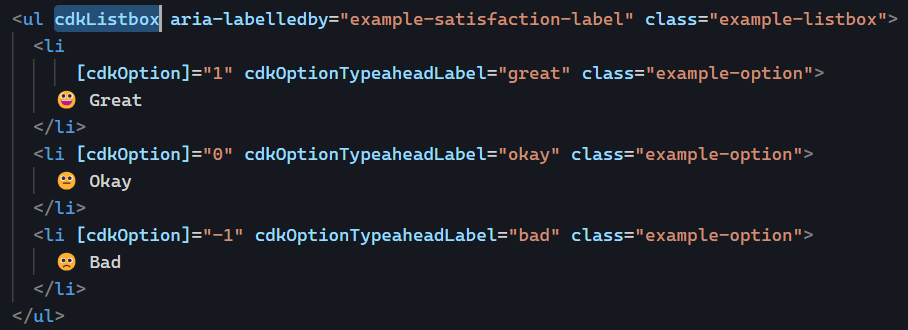
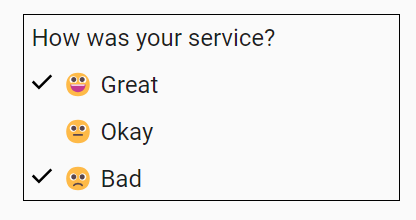
This is where the cdkListbox directive shines. Here’s an example:
The few lines of code in this example add the following select-dropdown-like features to these basic HTML list items:
A numerical value is associated with the user selection (1, 0, or -1) thanks to cdkOption
Typeahead is available. If I click on the list and then type “o” on my keyboard, the “Okay” option gets selected.
The current selection can be changed using the keyboard’s up and down keys.
You can see that example in action on Stackblitz here. Another nice feature of the Angular CDK is that all its directives are standalone, so we can import just what we need in our components: