I’ve touched on when it makes sense to create custom directives , how to use bindings in directives, and how to get creative with Angular selectors.
Today, let’s tackle how to create custom directives. The first thing to do is to use the Angular CLI:
ng generate directive [name]
or ng g d [name]
It’s also possible to generate standalone directives with the --standalone option:
ng generate directive [name] --standalone
Once you’ve done that, you end up with an empty class to implement:

At that point, it’s important to remember that a directive is just like a component. The only difference is that a directive doesn’t have an HTML template. As a result, we can still use @Input(), @Output(), and all sorts of bindings and listeners.
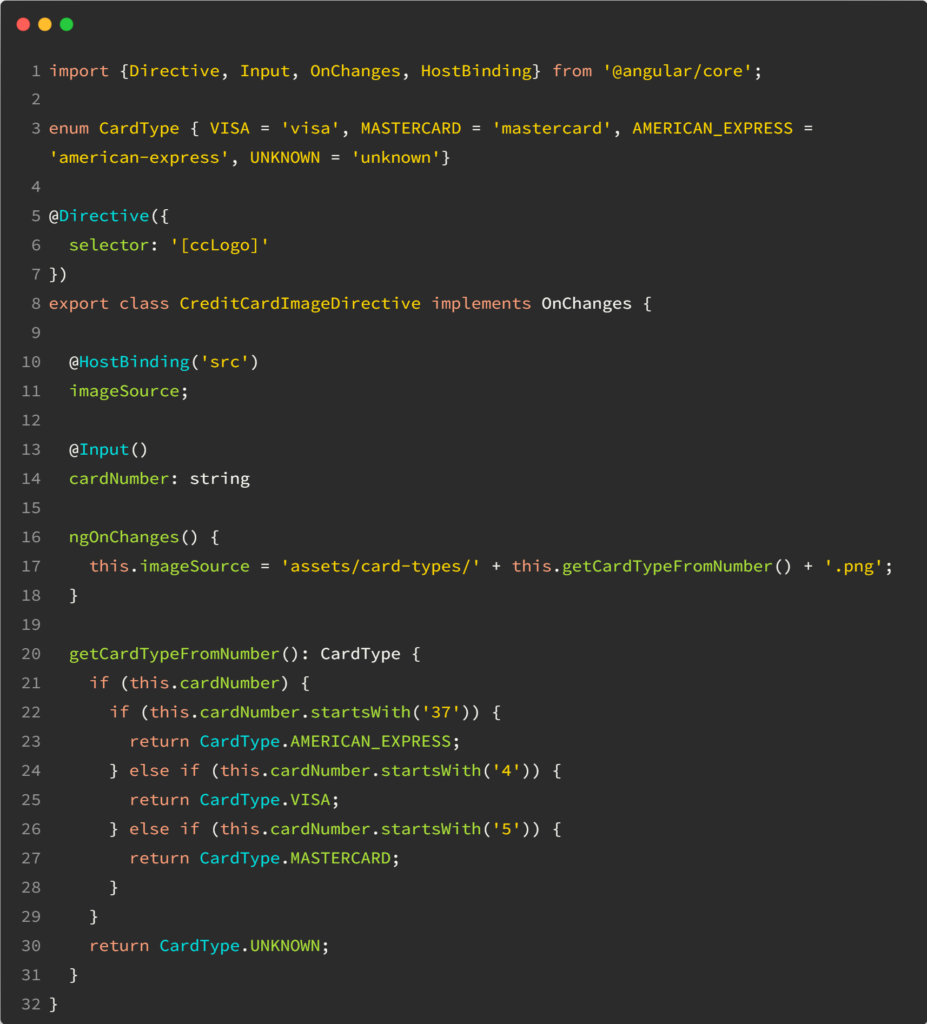
As a result, your directive will manipulate HTML attributes and events on its host element. Here is a typical example of a custom directive that sets a credit card logo image based on a credit card number:

Its source code looks like this:

As you can see, we use an @Input() to receive the cardNumber and a host binding to change the value of the src attribute. You can find a step-by-step tutorial that explains the above code in more detail here.