RxJs subscribe callback functions

At this point, it is safe to assume that most Angular developers know about the following syntax. That’s how we subscribe to an Observable to receive its data:

If you’ve been reading this newsletter for long enough, you already know that there are better ways to subscribe to Observables and that there are no excuses for not using these techniques.

That said, it’s always good to know about all our available options. So here is another possible syntax:

The above syntax registers three different callback functions:

  • The first one is the same as in our first example – this is where the Observable data goes.
  • The second one is an error handler. Any exception thrown by the Observable would get caught by that callback.
  • The third callback function is invoked when the Observable completes, which means it won’t emit any more value.

Note that while that syntax still works (for now), it has been deprecated in favor of a more explicit syntax, where an object is passed. Each callback is attached to a named property, making the purpose of these callbacks more obvious:

Anti-pattern series: Not unsubscribing from Observables

We covered this in our newsletter before: Observables can cause memory leaks if we don’t unsubscribe from them.

Before Angular 16, there were a few different techniques available to unsubscribe automatically, the best of those being the async pipe (and yes, it’s possible to use the async pipe 100% of the time if you use the tricks highlighted here – no excuses).

With Angular 16, things are even better, as you can use the new takeUntilDestroyed operator as follows:

But here’s my million-dollar tip for today: Instead of using takeUntilDestroyed in your components, use it in the services that expose such Observables:

That way, whether you use an async pipe or not, your components are covered. That’s one of the nice things about Observables: We can change them whenever and wherever we want using pipe(), including in our services – so that all subscribers benefit from that change downstream.

mergeMap RxJs operator

A few months back, we covered the switchMap operator from RxJs. Today, let’s look at a similar operator called mergeMap:

The marble diagram isn’t as obvious as it is for other operators, so let’s clarify what mergeMap does:

  • It takes values from an observable and maps them to another observable
  • Then it allows us to combine the values from both observables into one new observable

What’s a real-life use case for mergeMap?

Let’s say you want to display a list of products with their associated categories. The product information is stored in one API endpoint, and the category information is stored in another API endpoint. To display the list of products with their categories, you need to make a separate API call for each product to retrieve its category information.

You can use mergeMap to combine the two API calls and merge the results into a single stream of data (product + category).

How is it different from switchMap?

mergeMap differs from switchMap in two important ways:

  1. switchMap only returns the data from observable #2 – mergeMap returns data from both observable #1 and #2 and allows us to combine that data any way we want
  2. switchMap cancels observable #2 whenever observable #1 emits a new value, then re-creates another observable #2. mergeMap doesn’t do that.

In other words, switchMap is perfect when we want to chain asynchronous actions such as “user selects a new filter, then we request new data according to that filter” because if the user changes that filter again, we want to cancel the previous request and start a new one.

RxJs concatWith operator

Our operator of the week is concatWith (the new name for concat since RxJS v7). This operator takes any number of Observables, subscribes to them one after the other, in sequence, and then returns the values emitted by the first Observable, then the second one, then the third one, etc.

Unlike forkJoin, which runs these Observables in parallel, concatWith runs them one after the other and waits for the completion of an Observable before subscribing to the next one.

As a result, concatWith can be used when:

  • We need to make multiple HTTP requests in a specific order, one after the other.
  • We need to combine user input with server data. For instance, we let the user select multiple filters in the UI, and when the user is done, we trigger an HTTP request to the server.

Angular 16 Preview: TakeUntilDestroyed

Angular 16 will be released next week, and this new version will be big. I will cover most of the new features of Angular 16 for the next few days.

One of the simple but handy features shipped with Angular 16 is a new operator for RxJs Observables: takeUntilDestroyed.

We have covered several techniques to automatically unsubscribe from Observables in this newsletter.

takeUntilDestroyed will make all of it easier than ever:

And that’s it! That one operator will take care of automatically unsubscribing from data$ when the component/pipe/directive using it is destroyed.

Signals will be the most significant addition to Angular 16 (as a developer preview – for now), and as a result, I’m about to launch a short course on Signals. If you’re interested in beta-testing that course (for free!), please respond to this email to let me know.

RxJs takeUntil and takeWhile operators

Our Rxjs operators of the week are takeUntil and takeWhile. These operators are the opposite of skipWhile covered last week: They let the values from the source Observable pass through until a condition is met.

takeUntil is based on a second Observable and stops emitting values when that second Observable emits for the first time, as illustrated in this marble diagram:

takeWhile is very similar but uses a predicate instead of an Observable to decide when to stop emitting from the source Observable:

The primary use case for takeUntil with Angular is to automate unsubscriptions from Observables, even though I recommend less verbose approaches to automating unsubscriptions, such as using the async pipe :

The above code uses a subject to emit a value when the component gets destroyed, thanks to the ngOnDestroy lifecycle hook. Then, that same subject is used by takeUntil to complete the source Observable.

Here is a different example of takeUntil in action on Stackblitz.

RxJs skipWhile operator

Our RxJS operator of the week is skipWhile. This operator will ignore values emitted by an Observable as long as a given condition is true.

Its marble diagram looks like this:

The above example shows us that as long as the emitted values are less than 5, they get skipped.

What are some everyday use cases forĀ skipWhile? Here is an example where I want to wait for the user to type at least two characters in a form input before we start filtering (an addition to last week’s startWith example):

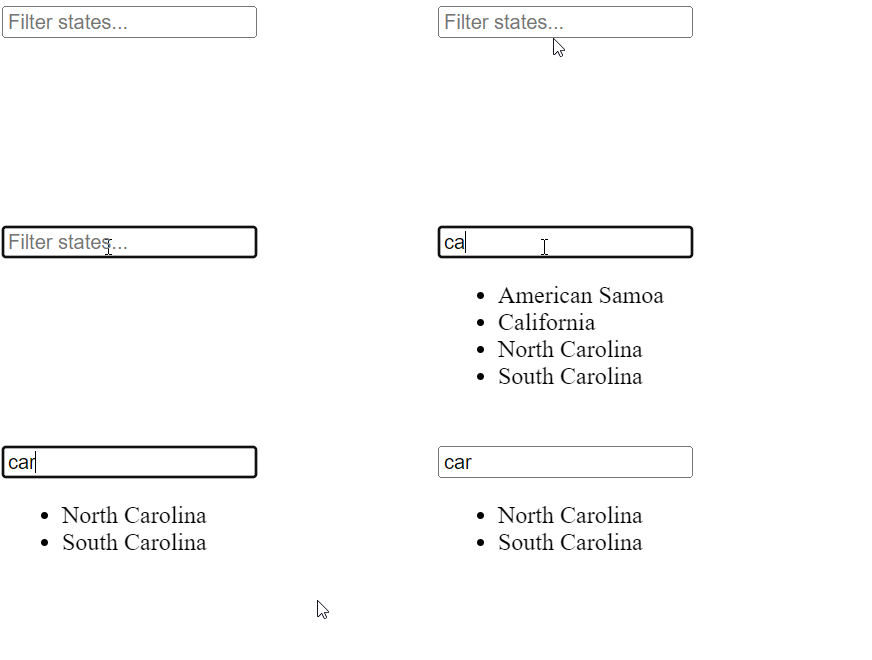
That way, the filter$ observable starts emitting values only when the source FormControl value has a length of at least two characters, which results in the following behavior:

This can be used to delay querying a server-side API with HTTP to start filtering only once we have enough meaningful data. This is somewhat similar to what can be done with the debounceTime operator.

You can see the complete example here on Stackblitz.

RxJs startWith operator

startWith is an operator that does something straightforward: It takes an existing Observable and makes it emit a default value immediately.

Its marble diagram looks like this:

What are some everyday use cases for startWith? Here is an example where I want to display a loader while data is being loaded from a service:

The loading property is used to decide when to show/hide a loader. This observable would first emit { data: null, loading: true } then the actual data with loading: false.

You can see the complete example here on Stackblitz ( I had fun with Typescript, the async pipe, and generics in that example, too).

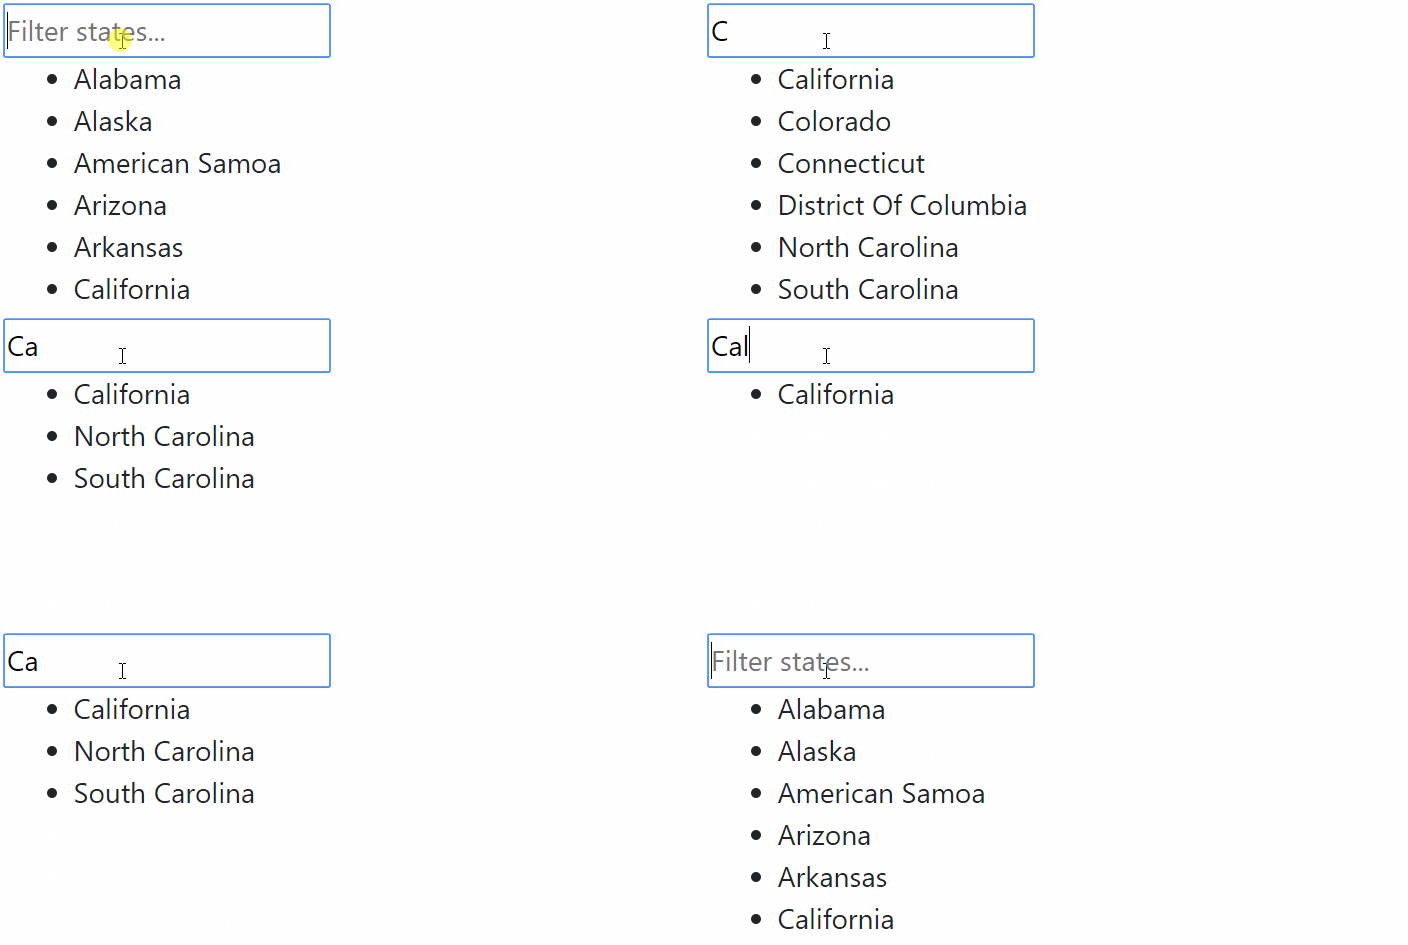
A more complex example in this tutorial is Dynamic filtering with RxJs and Angular forms. I describe how to create a text input used to filter a list of states as follows:

We need startWith in that scenario to start the filtering feature before the user has typed anything in the text input. That’s one of the most common use cases for the startWith operator.

Subject, BehaviorSubject, and ReplaySubject

We introduced RxJs Subjects a few weeks back.

BehaviorSubject

The most common type of Subject used with Angular is BehaviorSubject. Why is that? Because a BehaviorSubject has two exciting features that a plain Subject does not have:

  • It starts with a default value, which means it is never empty.
  • When we subscribe to a behavior subject, it will immediately give us the last emitted value.

Imagine subscribing to a magazine and receiving its latest published issue immediately. That’s what a BehaviorSubject does. This is helpful if you have components that need to know about the app’s current user. When the component subscribes to the “current user,” we want to get that info immediately and not wait for the next user update.

Also, since behavior subjects always have a value, they have a getValue() method that synchronously returns the current value.

ReplaySubject

A ReplaySubject is very similar to a BehaviorSubject, with two key differences:

  • No default value
  • Can replay more than just the last value

The constructor parameter determines how many values should be replayed to new subscribers:

Subject

A plain Subject has none of the above capabilities. When a value is emitted, current subscribers receive it, but future subscribers won’t. There is no replaying of the latest value(s), which makes plain Subjects less interesting to work with.

RxJs share and shareReplay operators

Last week, we covered the difference between hot and cold Observables in RxJs.

Today, let’s talk about how we can make a cold Observable hot. Why would we want that? Say our Observable is an HTTP request we want to trigger before any component subscribes to it. We saw that Observables from the HttpClient are cold, meaning that they only start fetching data when a subscriber comes over.

By making the Observable hot, the HTTP request would get triggered immediately. The share operator would do exactly that for us:

Under the hood, share turns our Observable into a Subject, which can handle multiple subscribers and is hot by default.

The only problem with the above example is that the data could be emitted before any subscriber gets the chance to subscribe to that new hot Observable.

As a result, it makes more sense to use shareReplay instead as it’s going to replay the latest value(s) to any new subscriber (just like a ReplaySubject):

This code is much better because:

  • The request is going to fire instantly before any subscription happens
  • Any future subscriber will receive the same data from that original request instead of firing a new request.

You can look at this blog post for an illustration of the above operators with a code example.