Async pipe syntax tricks

Yesterday, we wrote about how to use the async pipe to automatically subscribe and unsubscribe from our observables.

When I teach that topic, people usually have at least one of these two objections:

What if I also need the data from that subscription in my Typescript code?

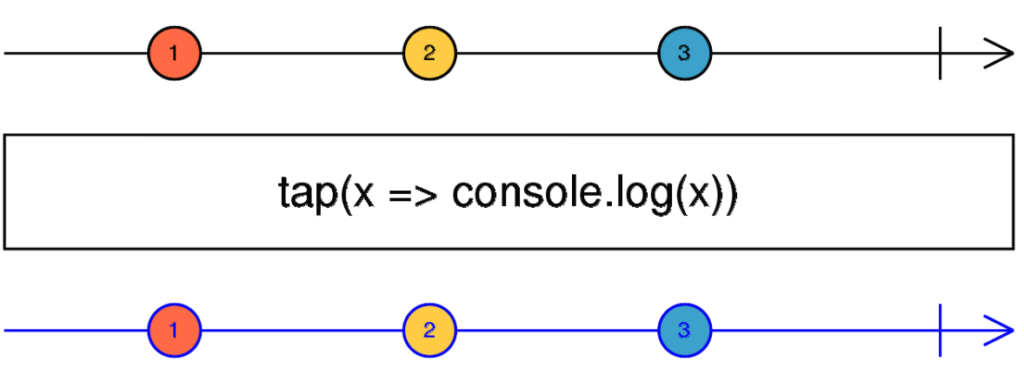
At first, using the async pipe seems only to give you access to the data in your HTML templates. That isn’t the case, though, because you can still use the tap operator to “spy” on your observable and get the data from there. For instance (complete example here):

this.name$ = nameService.getName().pipe(
    tap(name => this.name = name)
);Code language: TypeScript (typescript)

And then in the HTML template:

<p>Name from async pipe: {{ name$ | async }}</p>Code language: HTML, XML (xml)

What if I need to read multiple properties from the object in that subscription?

Another way to put it is that you don’t want to end up doing something like this:

<p>First name: {{ (user$ | async)?.firstName }}</p>
<p>Last name: {{ (user$ | async)?.lastName }}</p>Code language: HTML, XML (xml)

The above code is pretty hard to read and requires one subscription for each property. This alone can be a disaster, as each subscription might trigger an HTTP request for the same data from the server!

Instead, you can do something like this, which uses only one subscription, stores the result in a local variable, then renders the data when it’s available. This technique works with any structural directive, such as *ngIf or *ngFor:

<div *ngIf="user$ | async as user">
   <p>First name: {{ user.firstName }}</p>
   <p>Last name: {{ user.lastName }}</p>
</div>Code language: HTML, XML (xml)

If changing the DOM structure by adding an element to accommodate that subscription bothers you, then you can use ng-template instead, though the syntax here can be a little bit unsettling, too:

<ng-template [ngIf]="user$ | async" let-user>
   <p>First name: {{ user.firstName }}</p>
   <p>Last name: {{ user.lastName }}</p>
</ng-template>Code language: HTML, XML (xml)

Ok, that’s probably plenty enough for today. Tomorrow, we’ll see how we can do even better than this.

How to avoid memory leaks with RxJs observables?

The easiest way to get in trouble in a big Angular application is to create a memory leak by not unsubscribing from your observables. While there are different techniques to unsubscribe your observables automatically, one is more concise, elegant, and overall the most error-proof.

That technique is to use the async pipe from the Angular framework.

Why is the async pipe such a great tool?

  1. First, it automatically subscribes to the observable, so we no longer need to call .subscribe().
  2. It returns the data from that observable, triggering Angular’s change detection when needed for our component to display the latest data.
  3. Finally, it automatically unsubscribes from the observable when our component is destroyed.

All of that with just 6 characters! (ok, perhaps a bit more if you want to count the whitespace):

<div>{{myObservable | async}}</div>Code language: HTML, XML (xml)

The async pipe works exactly like the code we would write (and thus duplicate over and over again, making our code base larger and thus our code slower) if we didn’t use it.

Check its source code here, and you’ll see that all it does is implement ngOnDestroy to unsubscribe from our observable.

There isn’t any good reason not to use the async pipe, and if you think you have some, stay tuned for our next messages, as we’ll cover some nice tips and tricks around using that pipe.

How to generate documentation for Angular applications?

Documenting software is hard. Not only that, maintaining software documentation is even more complicated and often forgotten.

What’s the solution, then? What about using an automated solution that:

  1. Generates documentation from code comments and does not require a Wiki or any third-party software.
  2. Generates said documentation automatically and can be part of your build process.
  3. Gives metrics and feedback to developers to encourage them to write more documentation.

Such a solution exists. It’s called Compodoc. Compodoc can generate a Javadoc-like website from all the comments written in your application (you can see an example of such documentation here):

Compodoc can be installed globally with npm:

npm install -g @compodoc/compodocCode language: CSS (css)

Or you can add it locally to a single Angular project by running the ng add schematic in your project folder:

ng add @compodoc/compodocCode language: CSS (css)

Then you can create a config file to decide which files to include in the documentation (for instance, you might want to exclude test, and Compodoc is ready to run with a single command:

npx compodoc -p tsconfig.doc.jsonCode language: CSS (css)

The above command creates a static HTML website documenting your entire application with all modules/components/pipes/directives/services.

My favorite feature is the documentation coverage statistics that show which parts of the application are well-documented and which are not, using a report similar to test coverage reports that developers are familiar with.

RxJs combineLatest operator

combineLatest has a name that says it all: The operator combines the latest values from two or more observables into one observable.

This marble diagram is the perfect illustration of that behavior (click on the image to access an interactive version):

There are several possible use cases for that operator. The most common usage is filtering information by combining different sources, as illustrated in this tutorial on dynamic filtering with RxJs and Angular forms, which implements the equivalent of an auto-complete text input that displays new suggestions every time the user types new characters in.

What we get out of combineLatest is an array of all the latest values emitted by the combined observables. For instance, if we subscribe to combineLatest(obs1, obs2, obs3), the data we get is an array that contains [lastValueFromObs1, lastValueFromObs2, lastValueFromObs3]. The order of the data in the array matches the order in which we pass the observables to combineLatest, and that array of values will be emitted again every time one of the observables emits again.

A common gotcha of combineLatest is that the operator waits for all observable sources to emit at least one value before returning something, so it can be helpful to use it alongside the startWith operator, as illustrated in this example from our earlier tutorial.

Note: The operator is going to be renamed to combineLatestWith in RxJs 8+.

How to do advanced date formatting?

This week, we covered basic date formatting with the date pipe and the dateFormat function. While those tools work perfectly well for most basic scenarios, there are times when we want to do more complex date manipulation, such as:

  • Adding/subtracting days to a date
  • Displaying a duration, such as: “Last update: 2 days ago
  • Comparing dates

Most people use Moment.js for such use cases, but Moment.js is now officially done and in maintenance mode.

One of the best alternatives available is date-fns. It uses modern Javascript and relies on the native Date object as much as possible. If you’ve used Moment.js in the past, date-fns is going to look very familiar:

import { format, formatDistance, formatRelative, subDays } from 'date-fns'

format(new Date(), "'Today is a' eeee")
//=> "Today is a Friday"

formatDistance(subDays(new Date(), 3), new Date(), { addSuffix: true })
//=> "3 days ago"

formatRelative(subDays(new Date(), 3), new Date())
//=> "last Friday at 7:26 p.m."Code language: JavaScript (javascript)

The library contains some interesting helper functions, such as closestTo to get which date in an array is the closest to a given date, or formatDistanceToNow, which returns meaningful, readable distances such as “less than a minute” or “about one month.”

These features are independent functions, which is excellent for Angular applications as it allows tree-shaking at build time (only the functions we need are included in our build output), compared to Moment, which had one single moment() function that had everything in it, preventing proper tree-shaking.

Formatting functions in Angular

We mentioned the default config options for the date pipe in Angular yesterday.

Did you know we can also format dates in our Typescript code using a formatDate function?

This function has the same signature as the date pipe, which makes perfect sense because… That’s the function used by the pipe itself (source code here):

formatDate(value: string | number | Date, 
           format: string, 
           locale: string, 
           timezone?: string): stringCode language: JavaScript (javascript)

All you need to use that function is to import it from @angular/common:

import {formatDate} from "@angular/common";Code language: JavaScript (javascript)

The only downside of that function is that there is no default format or locale, so we have to pass those two values as parameters, which isn’t the case for the date pipe.

And by the way, similar functions are available for numbers, currencies, and percentages:

For more information on those functions, I have this tutorial on formatting dates and numbers with Angular.

Date pipe default format and timezone

The date pipe is the most convenient way to format dates with Angular. However, very often, we need to use a consistent date format throughout our application, which means that we have to pass that custom format every time we use the date pipe:

<span>Today is {{today | date: 'MM/dd/yy'}}</span>Code language: HTML, XML (xml)

Of course, we could store that format in a constant and reuse that constant every time we use the pipe, but that’s not very convenient.

Luckily for us, since Angular 15, we can now set a default date format (and timezone) by configuring a new injection token called DATE_PIPE_DEFAULT_OPTIONS.

It works by adding the following code to your dependency injection config (array of providers) in app.modules.ts:

providers: [
  {
    provide: DATE_PIPE_DEFAULT_OPTIONS, useValue: {dateFormat: 'MM/dd/yy'}
  }
]Code language: JavaScript (javascript)

With such a config in place, we can use our pipe without any parameters and have our default formatting applied automatically in our entire application:

<span>Today is {{today | date}}</span>Code language: HTML, XML (xml)

The timezone can be customized as well with the timezone property of that same DatePipeConfig object.

The debugger keyword

Yesterday, we covered how to use the JSON pipe with a <pre> tag to debug JSON data on a web page.

Today, I want to cover one more debugging technique that is another time saver: The debugger keyword.

Whenever you want to add a breakpoint in your web application, add the Javascript instruction:

debugger;Code language: JavaScript (javascript)

Then open the dev tools in your browser and navigate to your application URL. Whenever Javascript hits that debugger statement, the runtime will stop on that breakpoint, allowing you to debug your code:

Once the browser is paused on that breakpoint, you can add other breakpoints by clicking on the line numbers in the browser dev tools, just like regular debuggers work.

Two important things to note:

  1. The breakpoint works only when the dev tools are open
  2. Don’t forget to remove the debugger statement once you’re done debugging. You probably don’t want to ship that one to production.

Debugging with the JSON pipe

We have all used console.log at some point to debug our code. With Angular, there is an interesting alternative to display debugging information on our web page temporarily: The JSON pipe.

The primary usage is as follows:

<span>myData | json</span>Code language: HTML, XML (xml)

The above code will output your data as a JSON string in the span element, but it won’t be formatted, so the JSON string can be hard to read:

{"affiliation":"friendly","symbol":"Default Land Unit","echelon":"none","mod1":"None","mod2":"None","uniqueDesignation":"","higherFormation":"","reinforcedReduced":"","flying":false,"activity":false,"installation":false,"taskForce":false,"commandPost":"None","tacticalMissionTasks":"None","type":"Land Unit"}Code language: JavaScript (javascript)

Instead, the following syntax works a lot better:

<pre>myData | json</pre>Code language: HTML, XML (xml)

The pre HTML tag stands for “preformatted” content. As a result, that tag will preserve any whitespace, new lines, and tabs, which makes reading that JSON data a lot easier:

{
 "affiliation":"friendly",
 "symbol":"Default Land Unit",
 "echelon":"none",
 "mod1":"None",
 "mod2":"None"
}Code language: JavaScript (javascript)

It’s a simple trick, yet a big time saver when debugging code that’s using complex JSON structures.

RxJs switchMap operator

A common mistake made in Angular applications is to nest observable subscriptions in the following manner:

observable1.subscribe(data => {
   observable2.subscribe(otherData => {
     // Do something with otherData
   });
});Code language: JavaScript (javascript)

The above syntax is not recommended because it is hard to read and can lead to subtle bugs and unexpected side effects. For instance, that syntax makes it difficult to unsubscribe properly from all these observables.

Also, if observable1 emits more than once in a short amount of time, we might want to cancel the previous subscription to observable2 and start a new one based on the new data received from observable1. The above code does not do any of that.

The solution: Use the RxJs switchMap operator like so:

observable1.pipe(data => {
   switchMap(data => observable2)
).subscribe(otherData => {
     // Do something with otherData
});Code language: JavaScript (javascript)

The switchMap operator does all of the following:

  • Automatically cancel and unsubscribe from observable2 if observable1 emits a new value.
  • Automatically unsubscribes from observable2 if we unsubscribe from observable1
  • Makes sure that observable1 and observable2 happen in sequence, one after the other.

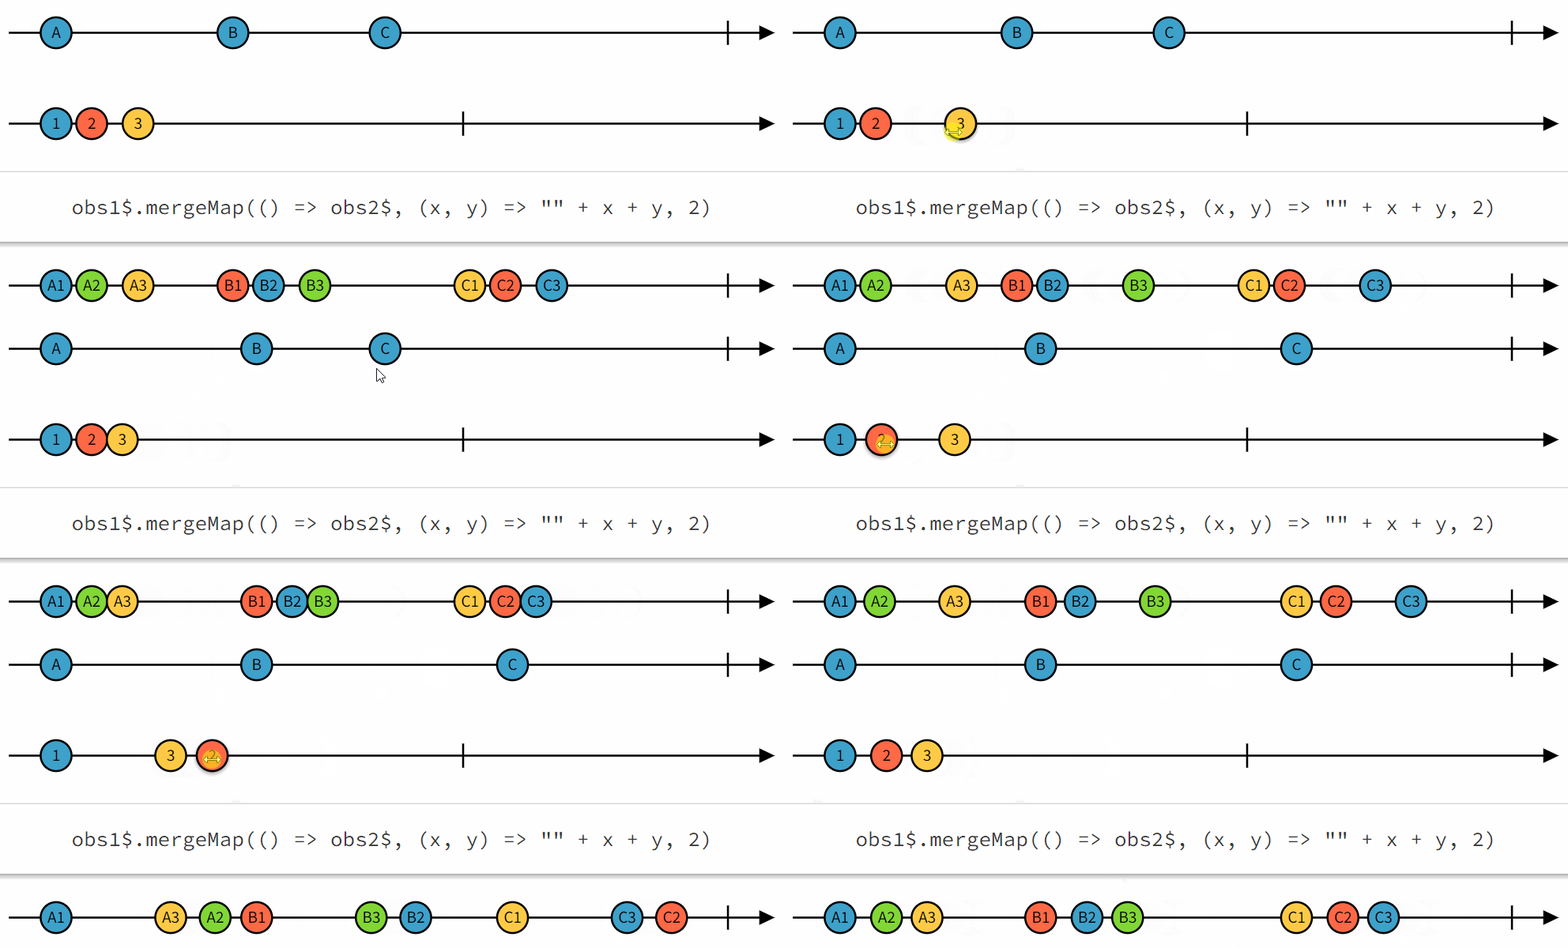
The following marble diagram is a good illustration of what switchMap does:

If you’re not using switchMap yet, look in your code for nested calls to .subscribe(), and you can start replacing those with the switchMap operator to prevent memory leaks and bugs and make your code more readable.

Here is a link to an example that uses a timer to make HTTP requests every 30 seconds to get updated data. The timer data is turned into an API call using switchMap on line 37 of the example.