Earlier this month, I polled people on LinkedIn to know which version of Angular they’re currently using at work. Here are the results:
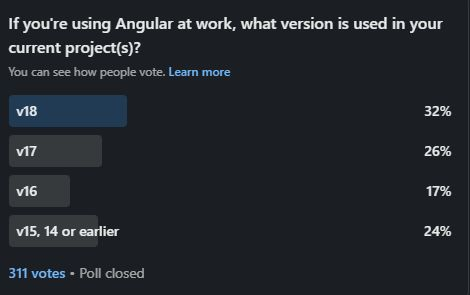
First, I was pleasantly surprised that most of them (58%) are fully up-to-date or just one major version behind. What’s more worrying is that 24% of them use a non-supported version. So I asked why people use older versions of the framework (you can contribute here with your comments if you want), and of course, I knew more or less what the answers would be: Time – Budget – Dependencies.
This made me think about the following: What if there was an Angular Upgrade Service? A hands-on service you could subscribe to that would keep your projects up-to-date. Do you think that would be of interest?
I’m always looking for gaps to fill in the front-end development space. This is why I created the Angular certification program, the React certification program, and just helped launch a Javascript certification program!)
In any case, if you think you could use an Angular Upgrade Service, please let me know (respond to that email or reach out on LinkedIn – always happy to connect!), and I might beta-test that idea with you in the next quarter.